Oh, the wonderful world of personlized labels!
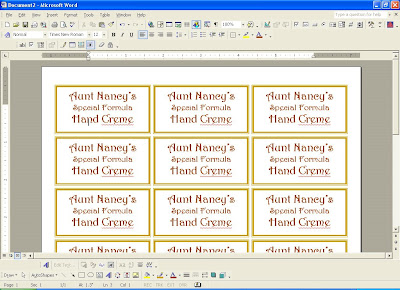
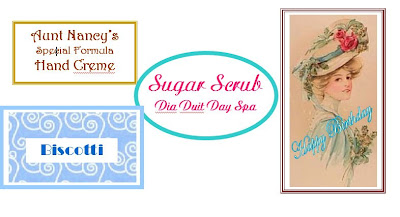 Those of us who love to give handcrafted items sometimes need labels. For instance, at Christmas I used Nancy's recipe for handcream as stocking stuffers and I made personalized labels for the jars. Later I was asked ... How do you make those labels? That's what this post is about - making dirt-simple labels in Microsoft Word that look way doggies more complex than they are. The labels above were all created by me in just a few minutes time.
Now, I'm not an Microsoft Word expert ... I'm not really an expert at anything! But I've fumbled around and explored Word long enough to have figured out how to make my own "designer" labels. It's quite possible there is a simpler way to make them, but this is the only way I know, so that's what I'll share.
First, I'll show you the simplest label - a block label.
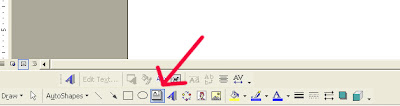
In Word, you'll need the drawing toolbar. If it's not open yet, go to View, select Toolbars, select Drawing. The toolbar should look something like this.
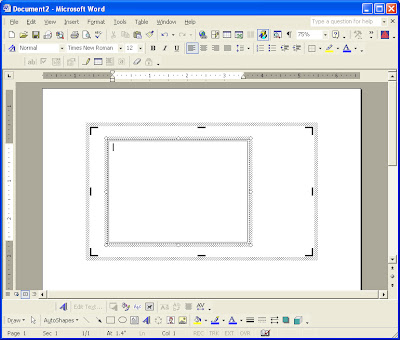
Select the Text Box button on the drawing toolbar.
 A drawing area will appear on your page.
 Within that drawing area, left click and drag to create a box the approximate size you want. Don't worry so much about the exact size because that can be adjusted later. Just make it big enough to work in.
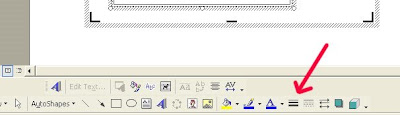
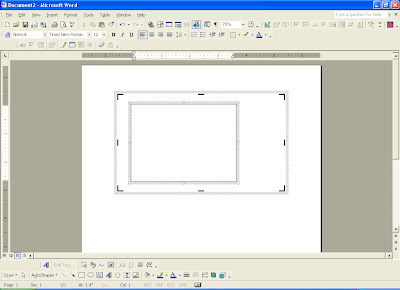 Click the Line Style button and choose the line style you want - in this case, I'm using a double line.
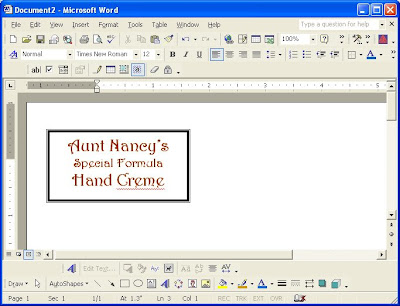
Click inside the box -- you'll know you've done it correctly if you can see your cursor inside the box. If you don't see it, click inside the box again. I don't know how many times I've mistakenly "grabbed" the whole box rather than clicked inside the box!!
Now, enter your text and modify it however you want -- font, size, color, centering, etc. I used Harrington font, I centered the text and selected the color and size I wanted.
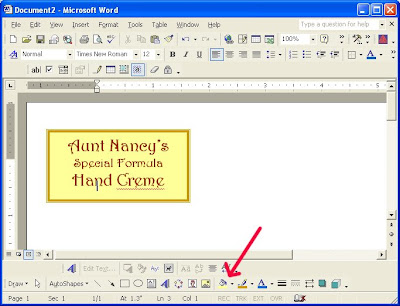
 At this point, I adjust the size of the box if needed and change the line color to coordinate. To change the line color, you have to click on the box -- sort of grab it -- and then click the line color button.
 You could also choose to have a tinted background by clicking on the box, clicking the Fill Color button and choosing a color.
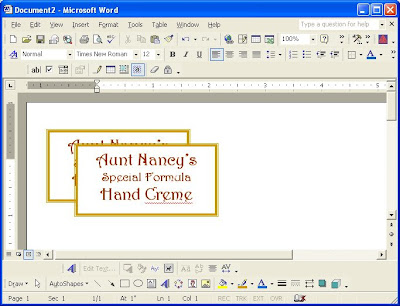
To make multiples of your label -- all laid out side by side on the page -- you just copy the box, grab the new one and move it wherever you want it. You can copy by right clicking the box, click copy, click on the page (to get out of the box) and right click paste. That will put a copy of the new box sort of on top of the original box. Hope that makes sense!?!? This would be much easier to explain if I was sitting next to you! But I can't do that, so if you have questions, please just leave a comment and I will edit the post to explain it better.
BTW - you don't have to stay inside that larger drawing box. You can drag your labels wherever you want them.
That's it!
Now you can print your new labels on regular paper, cut them out and glue onto your jar, bottle, can, bag, whatever ... or you can print it on adhesive backed paper.
This is the easiest, fastest, cheapest way I know to make labels. I'll show the steps for the other labels in the next few days.
 This has 2 fabrics on each petal.


